End-to-end AI model development in one platform in one place
AI model application is becoming bigger with many relevant use cases such as image and object detection. The progress was tremendous, and instead of developing the model from scratch, we could rely on a platform that would provide automatic model development.
I have recently come across an automatic hardware-aware AI model optimization platform with great potential, NetsPresso. We could have our model ready with a few steps and be used directly for our intended purposes. How could we use NetsPresso for our work? Let’s get into it.
What is NetsPresso?
NetsPresso is a hardware-aware AI model optimization platform developed by Nota AI, and it consists of the following modules:
- Model Searcher: For automatic model development
- Model Compressor: To improve model efficiency
- Model Launcher: Convert the model for deployment
NetsPresso adds value by minimizing the days-long optimization and deployment process by automating all the model selections to the deployment process to the target devices. We only need to provide the labeled datasets we want to use, and we are ready to go.
When this article was written, NetsPresso only provided model development for Computer Vision tasks such as Object Detection tasks and, over time, would introduce model development for Classification and Segmentation tasks. However, the model compressor works for the model with tasks other than Computer Vision.
The current NetsPresso is a low-code platform that provides a GUI interface. However, there are plans in the future to incorporate API and CLI interfaces. To understand better how NetsPresso works, let’s try a hands-on approach by using the platform for our model development.
NetsPresso Hands-On
The first step we need to do is sign up for the platform by using your email. After the signup process, we could visit the NetsPresso console by clicking the Start button on the top bar and see various services available.
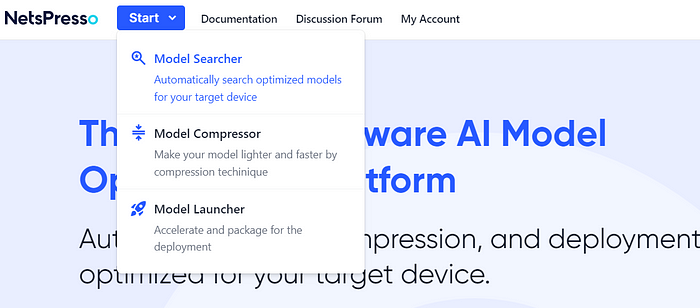
There are three services currently available. For example, let’s try the Model Searcher service to develop our model automatically. After you select the service, you are instantly taken to the console.
The bar on the left side would show all the available services. The UI was easy enough for us users to understand what services we could use and where to find them.
Models
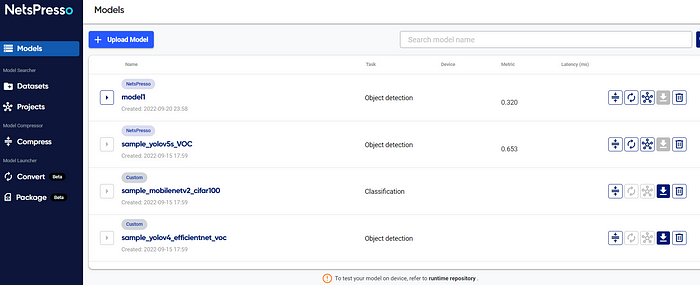
First, we take a look at the Models screen. Here are the places where we could review our trained model and also upload our model if necessary. If you decide to upload your model, then NetsPresso would require you to give information regarding your model.
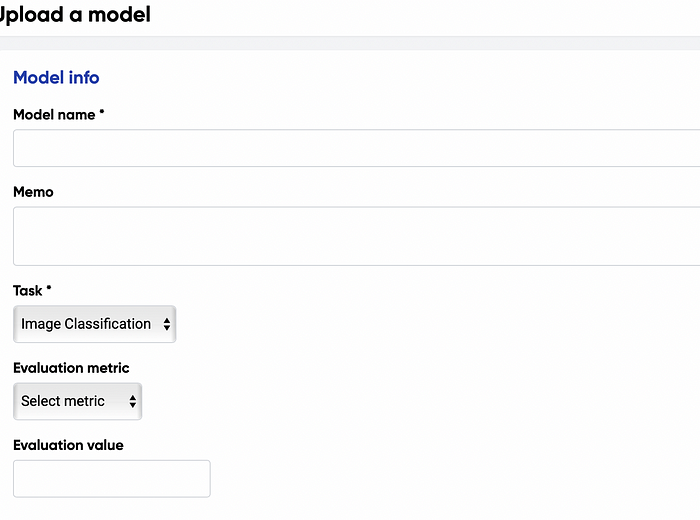
You could add various models for any task, such as image classification, segmentation, etc. Also, you could define the evaluation metrics you used for your project.
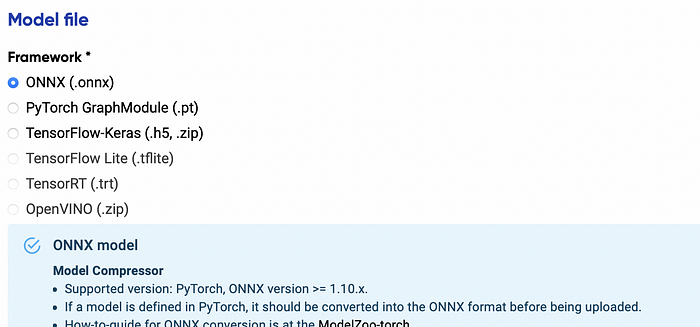
For now, the model framework we can upload is limited to the ONNX and TensorFlow-Keras, but it could be expanded further in the future.
Let's get into the Model Searcher services if you want to build your model with NetsPresso.
Model Searcher
Model Searcher service was used to automate the complicated model development process and was readily available for the hardware.
The value you could get by using the Model Searcher instead of developing the model yourself are:
- Less time on development with an excellent model performance
- Easy project execution with retraining choices
- The model quickly ready for production and packaging
What we need is to prepare the dataset before we develop the model. NetsPresso provides various sample datasets, but we could upload our own dataset.
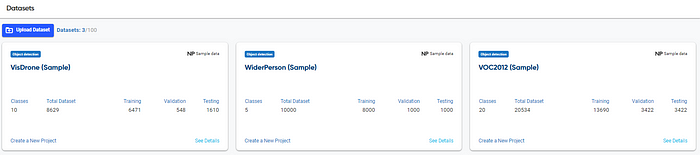
If we want to upload our own dataset, there are some formats we must follow. You can read the complete rule in the documentation. For now, let’s focus on the model development creation.
To start developing the model, we need to create a new project by selecting the project selection to choose training method seen in the below image.
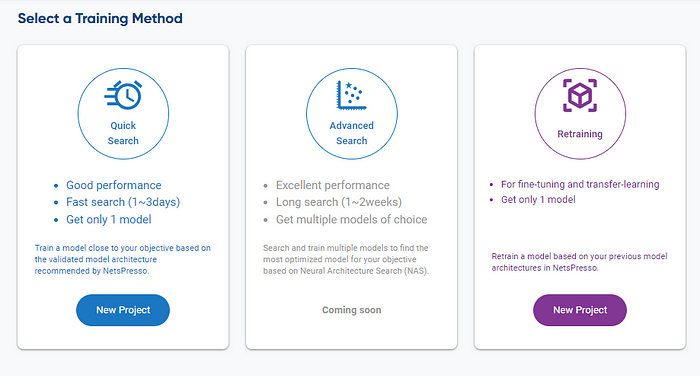
There are two currently available training methods; the quick search for a good performance model with fast search and Retraining to fine-tune and do transfer learning based on our previous model. The advanced search based on the Neural Architecture Search, which produces better performance, is currently unavailable at the time of this article written.
Let’s start our development by selecting Quick Search. When we use the quick search, we need to provide some information required for creating the model.
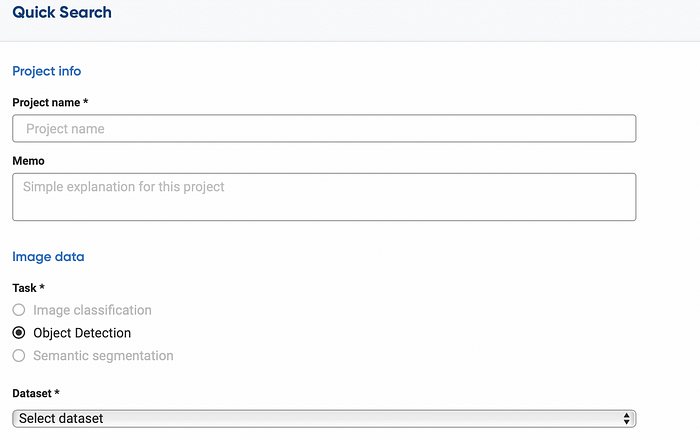
First, we need to inform our project name, the model tasks, and the dataset used for development.
Next, as the NetsPresso model development focuses on the Hardware-aware process, we need to specify our device target and the desired output.
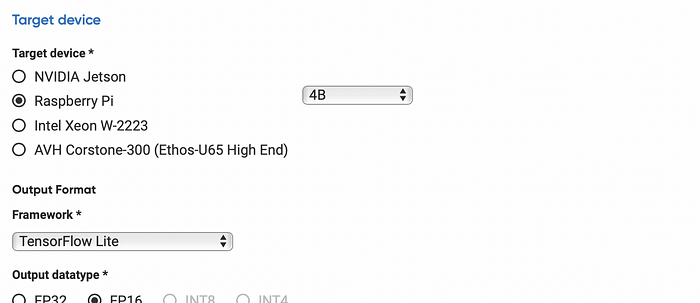
Currently, the only options the user can select as target devices are the three most popular devices for AI model development — NVIDIA Jetson, Raspberry Pi, and Intel Server. However, future plans would allow users to select various target devices including Arm Virtual Hardware, Renesas RZ series, NVIDIA Jetson Orin, and more.
The next step is to define the model training parameter. In general, we don’t need to tweak much, and we could let the NetsPresso do the hard work.
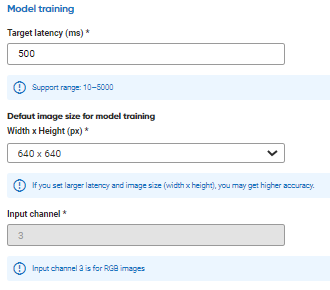
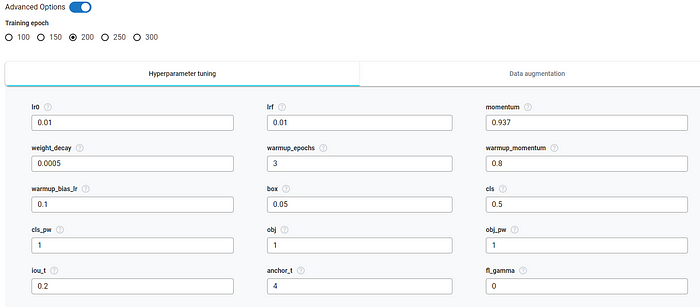
However, an advanced option lets you control the model hyperparameter if you want to be more specific.
With all the selection done, the next step is to select the model we want to use for training. As our current task is object detection, we would use the model based on the YOLOv5 algorithm.
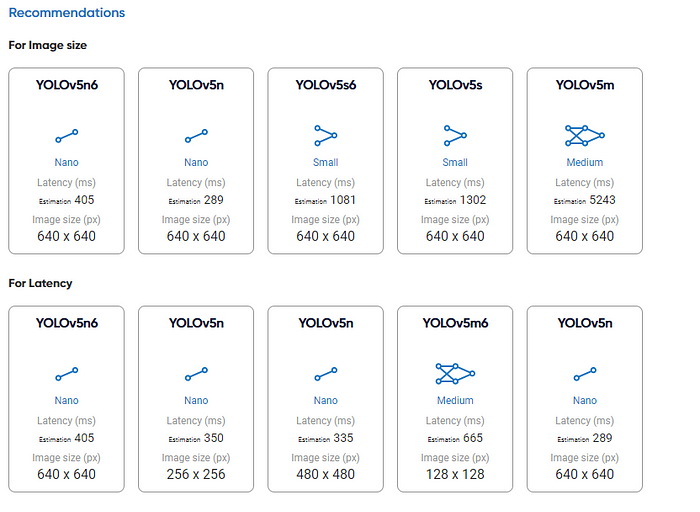
Choose the appropriate version for your model development and the server for the development, and we are ready to go.
The training time would vary depending on the dataset and the complexity we decide. However, after the training is finished, we will be notified in our email.
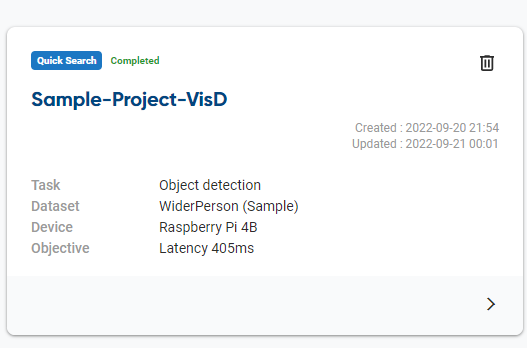
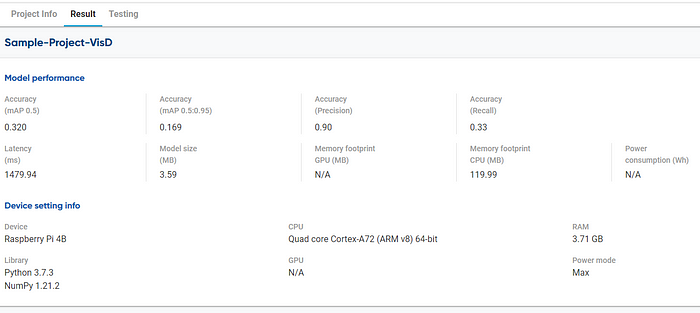
By selecting the project, we can acquire detailed information on the training result and model performances.
If we are satisfied with the model result, we can process to the next step to convert our model into a package that is ready to use. However, if we want to retrain the model, we can always choose the retraining process.
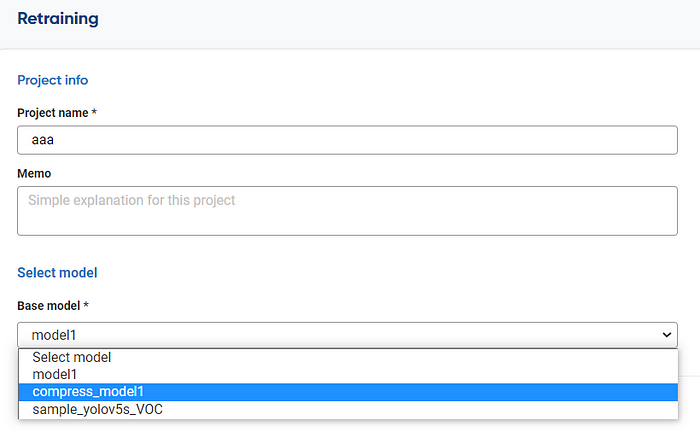
Select the base model we have created and use the NetsPresso platform to do the retraining. The rest is similar to our previous endeavor, so it’s easy to get familiar with the system.
Model Compressor
As the name states, Model Compressor services help to optimize the model efficiency by compression. The service allowed the PyTorch or TensorFlow model to improve inference speed by reducing the amount of computation but still keeping the current accuracy intact.
Additionally, the Model Compressor service allows the user to visualize the neural network structure and available layers to be compressed. This would enable the user to profile the neural network and decide which layers to compress and by how much.
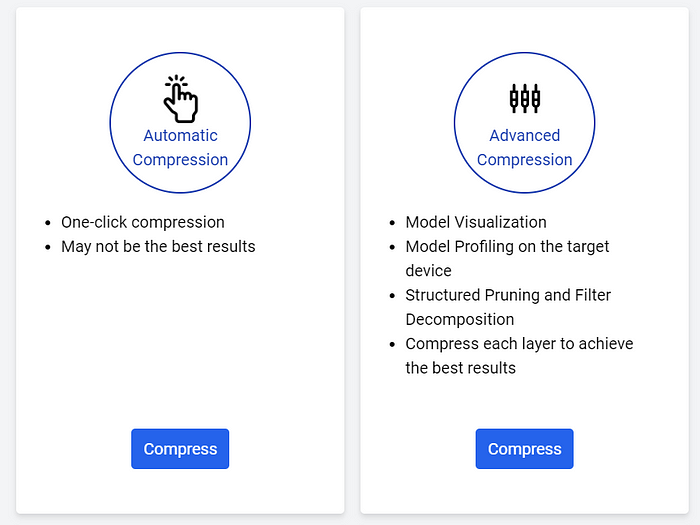
There are two selections for model compression: automatic compression, which works quickly, and advanced compression, which we can control. Let’s take a look at the automatic compression first.
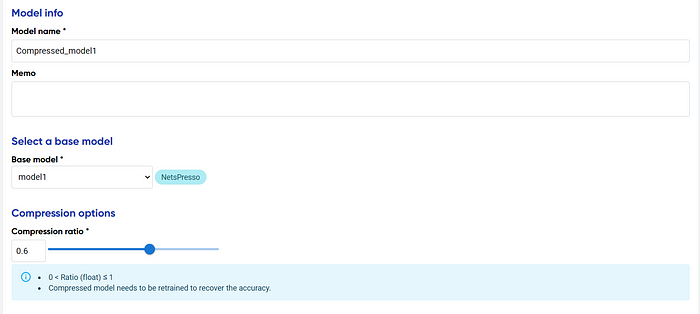
The Automatic Compression UI is simple; you only need to choose the model you have uploaded or developed and select the compression ratio. The compression ratio would allow the user to acquire a faster model with decreased accuracy. Finding the right balance would require users to try out the best ratio.
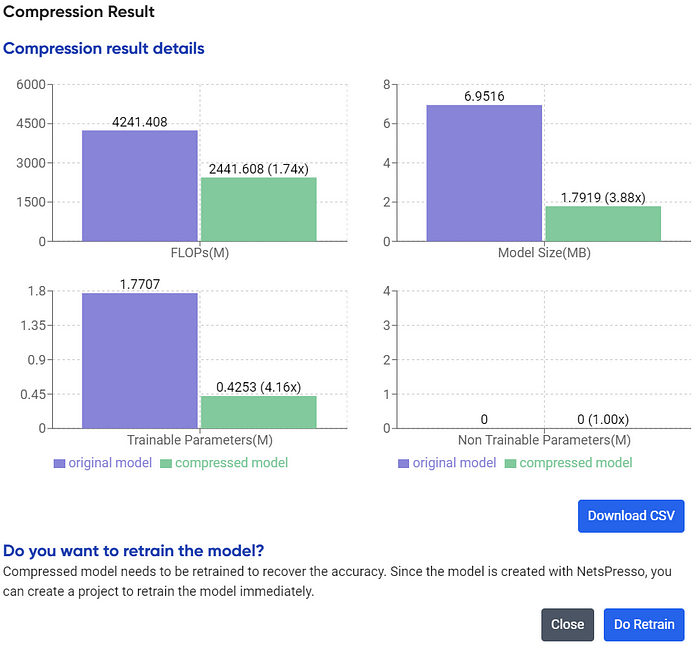
Press the continue button, and we will receive the compression report information.
After retraining, you would acquire the model immediately in the Models section. However, if you are still unsatisfied and want to control more of the layer to compress, we can use advanced methods.
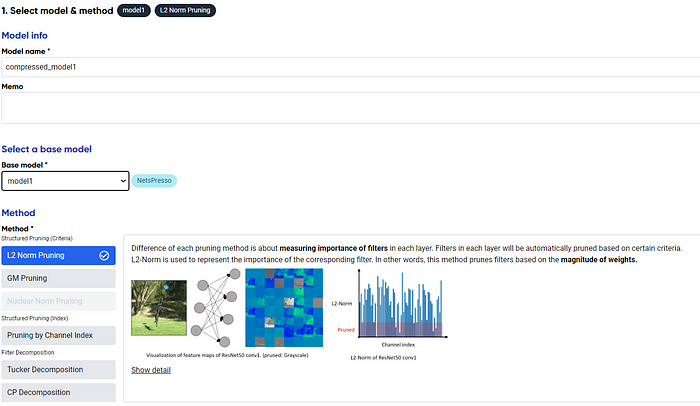
Like automatic compression, choose the model we want to compress, but in advanced compression, we could also select the compression method. There are various methods you could try; choose the one you feel is right for your compression.
With the advanced method, the layer profile would be automatically analyzed, and you could figure out the structure to compress, similar to the image below.
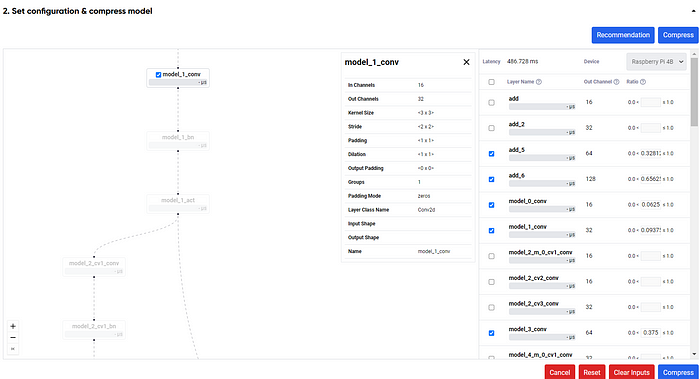
The next step is to select the compression ratio of each available layer. If you want, we could also choose the recommendation button to get the layer compression ratio recommendation. After that, the compression would happen similarly to the automatic compression, and you acquire the result.
The process takes around 5 minutes, but it could vary depending on the model itself. Overall, the UI is easy to navigate, and users could benefit from using the compression service even if we are not developing the model using NetsPresso.
Model Launcher
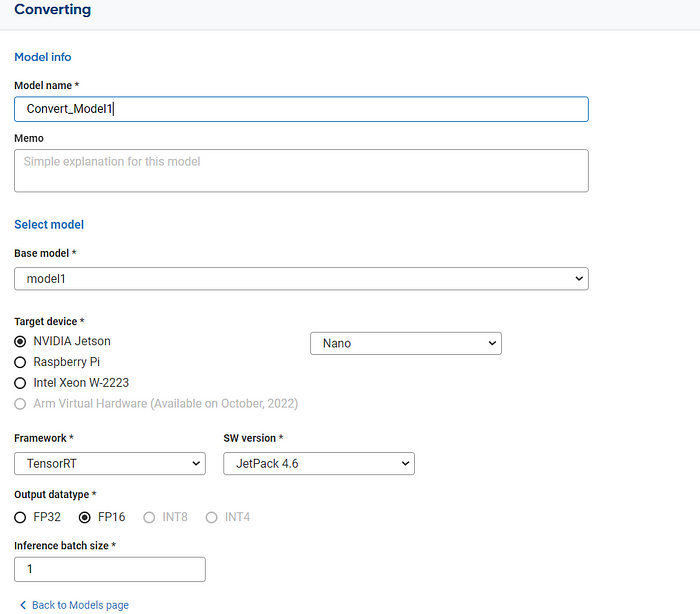
When the model is ready to be deployed, Model Launcher will help the user to convert and package the model in the form we need.
The model converter works as stated; the service would convert the model into the properties we require. Whether you need the model you have created previously or something you have uploaded, the converter works well for them.
When your model is ready, and you want to create your model package, we can select the package services and supply the information your devices require. For the processing code sample, you could visit the sample link provided by NetsPresso.
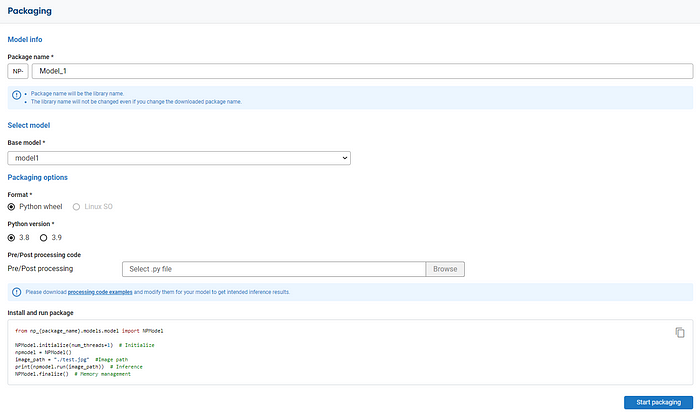
For further information, you can refer to the documentation provided by NetsPresso.
Conclusion
NetsPresso is a platform for automatic Hardware-aware model development with easy UI to use and decreases the complexity of the model processing.
NetsPresso provides three main features, they are:
- Model Searcher
- Model Compressor
- Model Launcher
Model Searcher allows the user to develop a model automatically with the parameter we require, with excellent performance, and quickly.
Model Compressor allows the user to compress the model to get a more efficient model.
Model Launcher gives the user to simplify the conversion and packaging process to use the model.
I hope it helps!


AI accelerator insider insider
Thank you for subscribing
Level up your ai accelerator insider career & network with ai accelerator insider experts.
An email has been successfully sent to confirm your subscription.
 Follow us on LinkedIn